Quick information for first time web meeting organizers
The ISO Webex service allows groups of people to participate in "virtual" meetings over the internet. As the meeting organizer, you will be responsible for running the Webex software so that participants can see your computer screen, hear your presentation, and (optionally) see you via a web camera.
What do I need to organize an ISO web meeting?
|
|
|
|
|
|
To organize an ISO web meeting, you need the following:
- An ISO Webex account. If you don't already have one, you can request one at webconferencing@iso.org.
- A computer with a browser and broadband internet connection (384 kbps or faster).
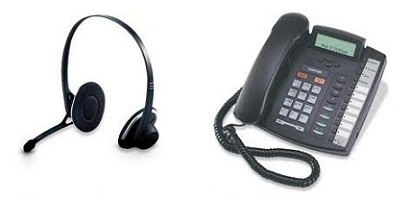
- A computer headset (earphones and microphone) or a telephone.
- A copy of your web meeting invitation.
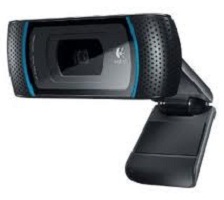
- A web camera can be used, but is not required.
- A tranquil work area free of noise and other distractions is recommended.
- If several people are meeting in one conference room, then the use of a single computer with a large display (or projector) and a conference room telephone is advised.
How do I create an ISO web meeting?
- Before your meeting starts, please test your computer's ability to join a web meeting here. Enter your name and e-mail address as requested. Note that this test may install required Webex plugins on your computer.
- If you plan to use a headset and/or webcam, please test these devices on your computer before your meeting starts.
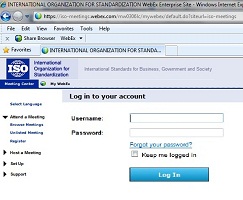
- Login to your ISO Webex account at https://iso-meetings.webex.com. On the left side of your screen, you will find a link to "Schedule a Meeting".
- Before your first meeting, schedule a practice meeting with a willing participant to help you become more familiar with the software. Always send a copy of your meeting invitation to yourself.
- To start your meeting, click on the meeting hyperlink which you sent by e-mail. You may be required to log into your account when the meeting launches.
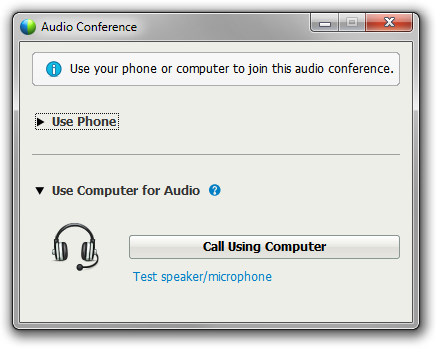
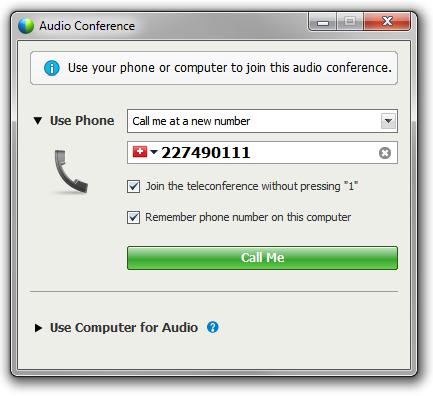
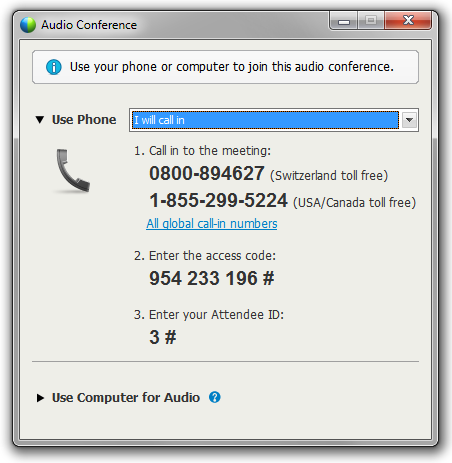
- If you are using a computer headset, click the "Use Computer for Audio" link in the Audio Conference window, then click on the "Call Using Computer" button. If you are using a telephone, select "Call me at a new number", click on the flag icon and select your country, enter your telephone number without your country code, then click the "Call Me" button. You may also select the "I will call in" option and dial the toll or toll-free number listed for your country (here).
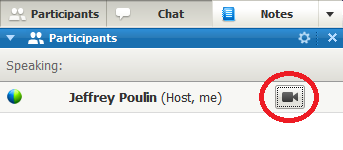
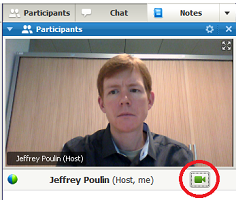
- If
you have a webcam, click on the camera icon next to your name in the
participant list to activate your webcam. The camera icon will turn
from grey to green to indicate that your webcam is on. To deactivate
your webcam, click on the camera icon again.
Connecting to the web meeting audio using voice over IP, telephone callback, or toll-free dial-in
|
|
|
|
Activating and deactivating the webcam
|
|
|
How do I run a web meeting?
- Once you have started the web meeting (see above), you will need to share your desktop or a particular application. Click the "Share My Desktop" button to share your whole screen, or click on the down arrow to share an application. (see graphic below)
- During your meeting, you will have a Webex control panel. Normally it is hidden, but it appears when you move your mouse to the top center area of your screen. Here you can change your audio connection (for example, switch from headset to telephone), see a list of meeting participants, send text messages to meeting participants, or perform other operations. Many of these are toggle buttons. That is, to show the list of participants, click on the participants button. To hide the list, click on the participants button again.
|
|
|
Ending a Web Meeting
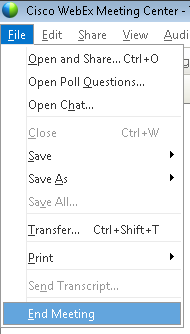
- To end the web meeting, click on the "Stop Sharing" button in the Webex control panel (see above), then select the "File" menu and select "End Meeting". You can also end the meeting directly from the control panel as shown below (right).
Quick tips for a successful meeting
- Do not use more than one computer in the same meeting room. If several people are meeting in the same place (for example, a conference room), use one computer connected to a projector and a conference room telephone for the audio.
- For large meetings (more than 6 participants), background noise can become an issue, especially if participants are using speaker phones or low quality headsets. For the best audio experience, consider asking participants to mute themselves (via their Webex control panels) when they are not speaking. If background noise is still an issue, the meeting organizer has the option to mute participants individually.
- Participants with a noisy phone or headset may get better sound quality by switching from a telephone to a headset, or from a headset to a telephone. Participants can change their audio connection in their Webex control panels.
- In general, computer headsets and land-line telephones in non-speaker mode provide the best audio quality for all participants. Using a computer's built in microphone and speakers or a telephone in speaker mode should be avoided as these devices can cause sound problems for all participants.
- Start your meetings a few minutes early to allow extra time for participants to sort out audio or web problems.
- You can find much more information on how to host a Webex meeting at http://howdoi.webex.com in the "Meeting Center" section.
Still need help?
If you still need help organizing an ISO Webex meeting, please send your request to webconferencing@iso.org.





Add Comment